Leveraging Wazuh Even More - Suricata NIDS Integration
Integrating Suricata with Wazuh brings many benefits. From inspecting our server's network traffic providing additional insight into our security, in tandem with Wazuh's own capabilities, we will leverage both tools to further harden our server as well as provide visual data using the ELK Stack.

It's been quite a while since I last made a post! I have been busy interviewing and searching for my next opportunity. I've been taking my time doing a lot of research mainly on picking the right company where I would be a good fit at according to my values, and the specific role I am looking that will not only compensate me fairly, but also allow me to make that long sought jump from IT to InfoSec so I can continue to grow in my career! With that out of the way, this blog post will continue off where I ended in the More Work to be Done - Ubuntu Server Hardening post. To summarize, we further hardened our server by analyzing logs from Cockpit determining whether any actions needed to be taken as a result of the unsuccessful SSH bruteforce attempts made on our server, in addition to installing Wazuh, a SIEM solution. Now we want to leverage Wazuh even more by not only taking action from the security configuration assessment (SCA) scan results that Wazuh provided, but also integrating a network intrusion detection system (NIDS) called Suricata with Wazuh. Together these tools will provide much more needed visibility allowing myself to make more informed decisions on what further hardening measures I can take. On top of this, we will use the ELK Stack to also visualize our data to see where improvements can be made providing further insight on how progress is being made over time.
Integrating Suricata with Wazuh
We will use Wazuh's documentation on Suricata here as our guide. We will set up Suricata on our Ubuntu Server 20.04 LTS. Depending on your OS, I used this page here from the Open Information Security Foundation (OISF), the developers who maintain Suricata along with the community. The download page here provides links for downloading Suricata on other OSs. Install Suricata with the following commands:
sudo apt-get install software-properties-common
sudo add-apt-repository ppa:oisf/suricata-stable
sudo apt-get update
sudo apt-get install suricata
Ignore the other steps listed by Wazuh. Alerts should automatically generate. Wazuh automatically parses data from /var/log/suricata/eve.json and generates related alerts.

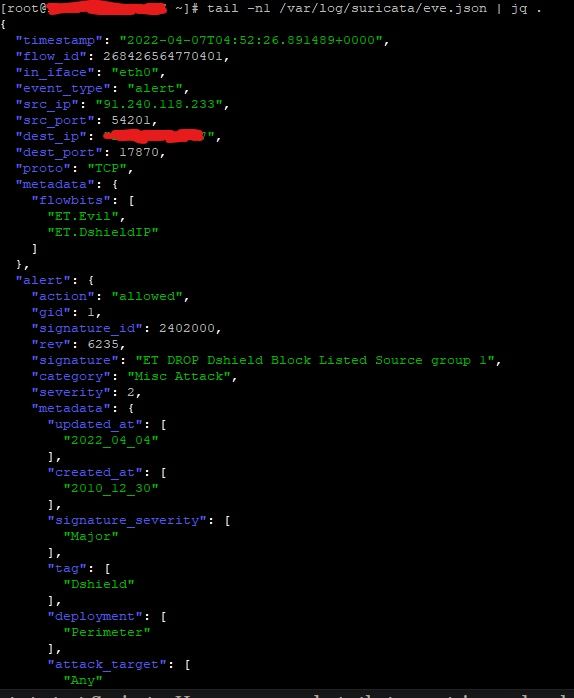
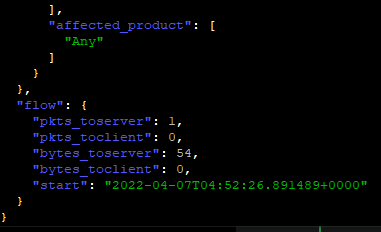
To see alerts in your Wazuh dashboard, head to the Security events module and add the filters in the search bar to query the alerts:
rule.groups:suricata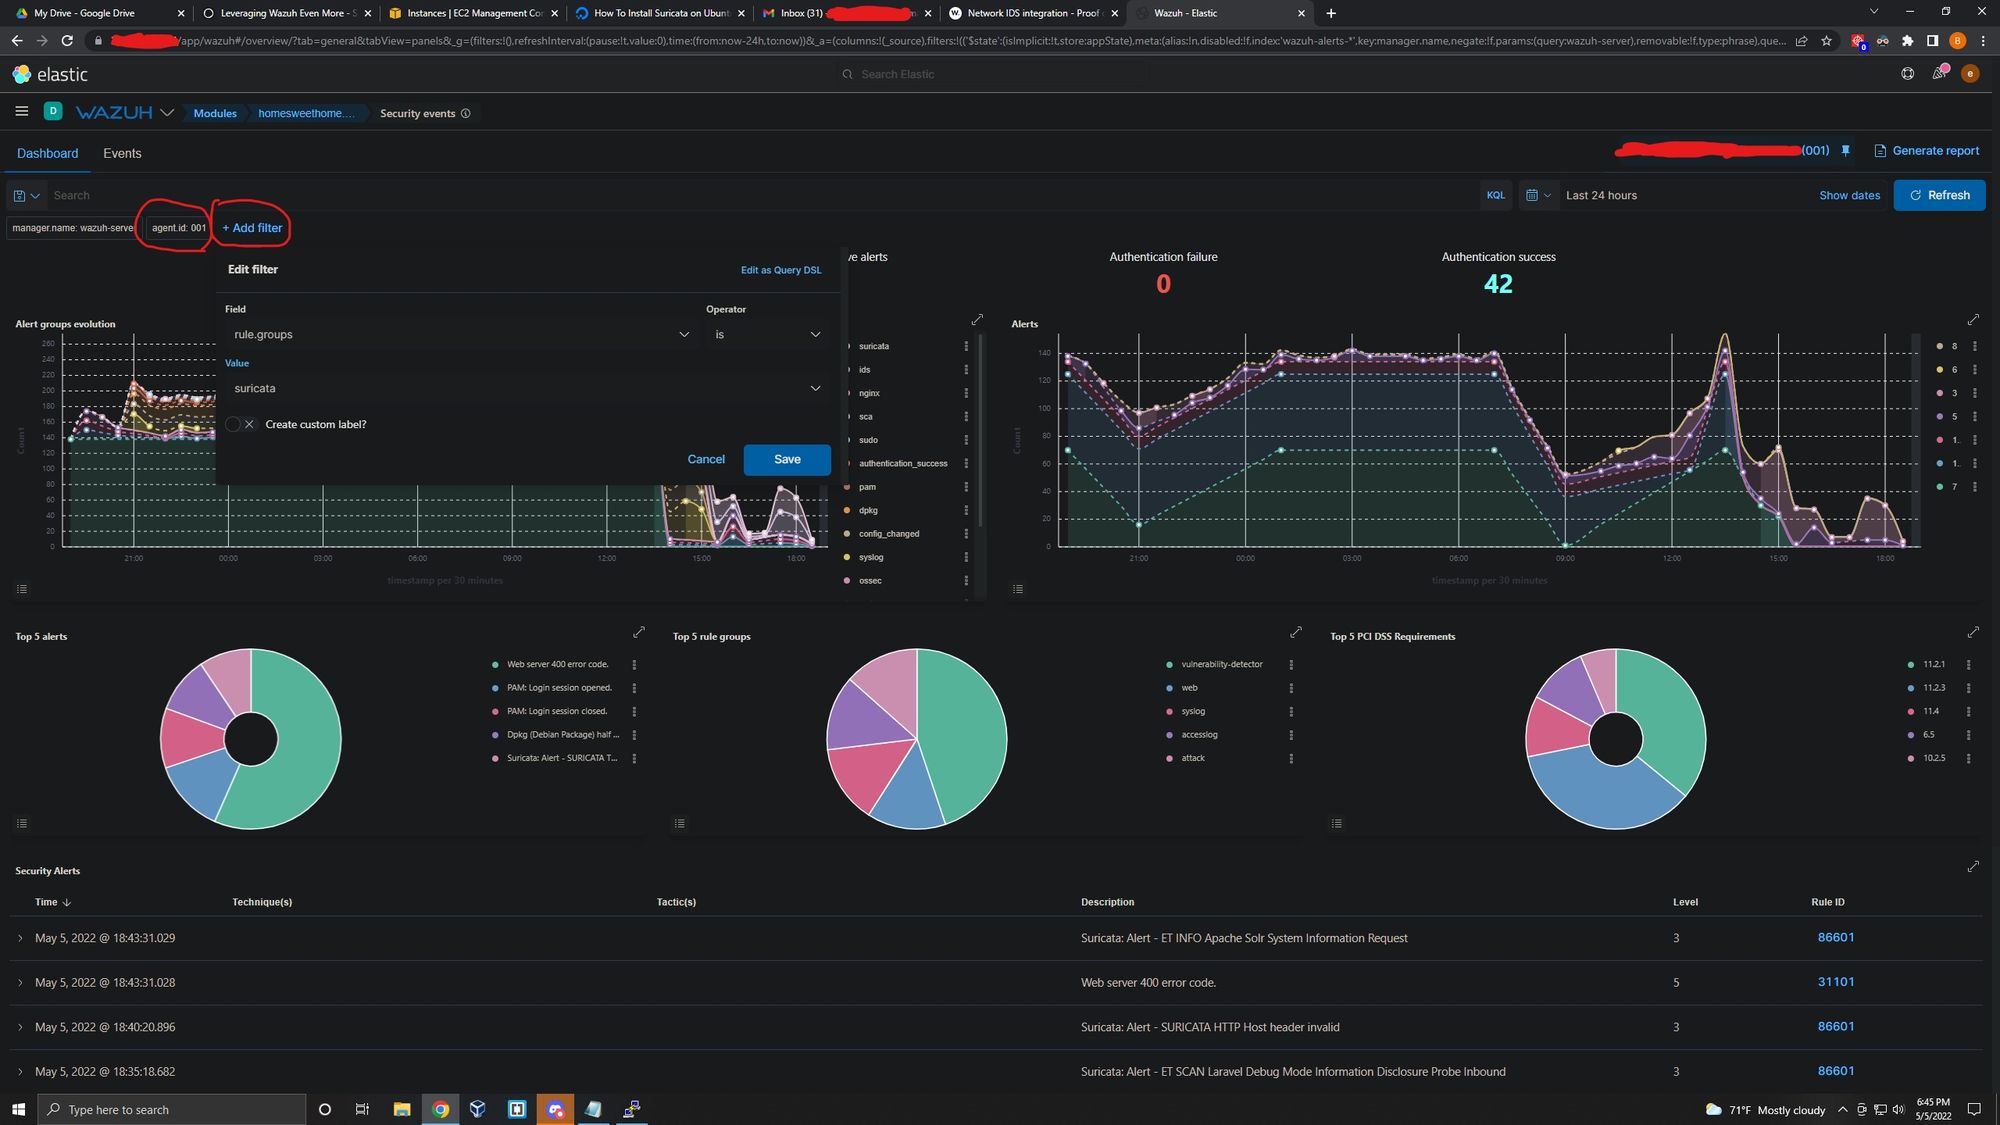

We now have Suricata integrated with Wazuh! Let's now take action on the security configuration assessment scan results that Wazuh provided in our last blog post "More Work to be Done - Ubuntu Server Hardening".
Using SCA Scan to Secure Our Configuration Posture
Wazuh provides a module called Security Configuration Assessment (SCA). In short, it scans a system by providing out-of-the-box checks that are used for systems hardening. More info can be found here. We saw how the SCA scan provided the following results:

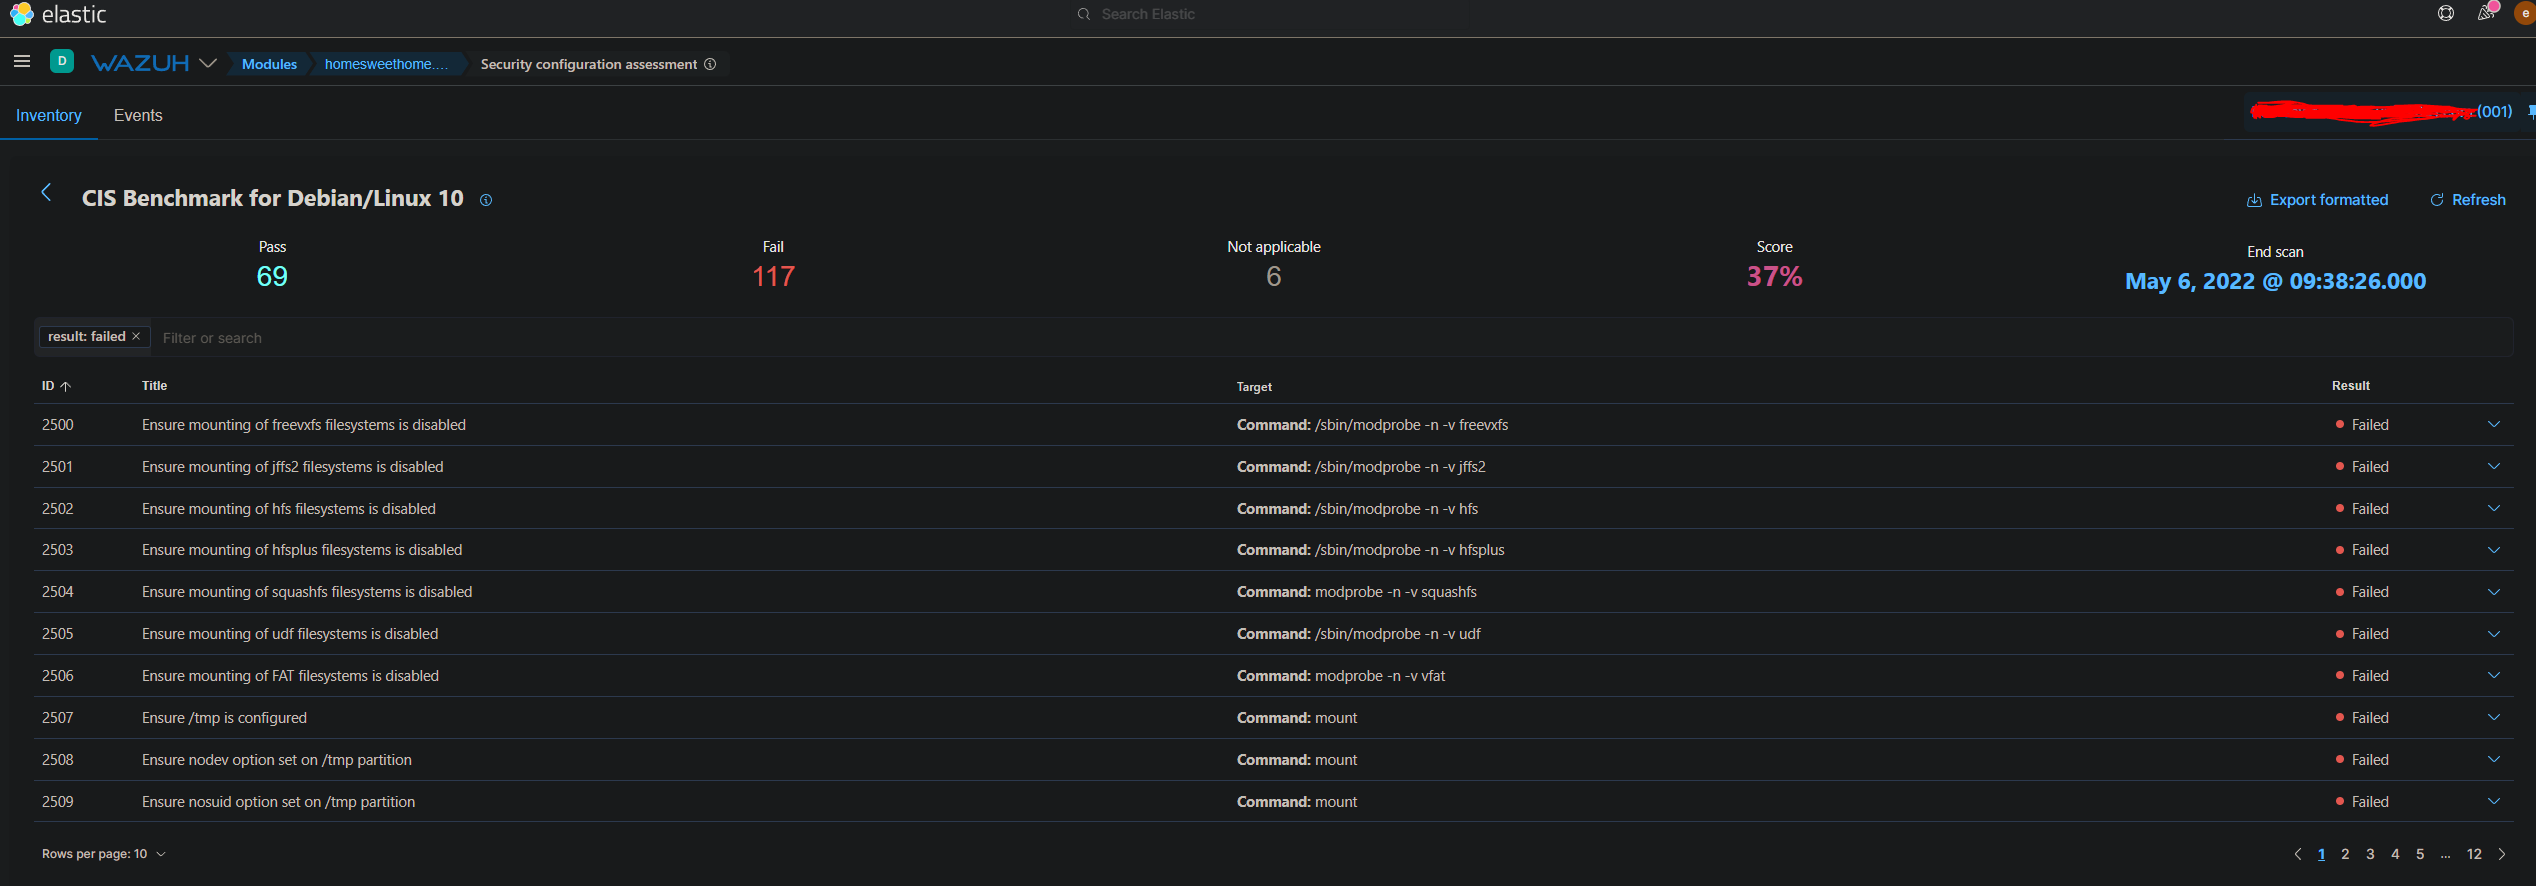
We won't be reviewing each failed check. Rather we're going to cover how to remediate several of them. For example, in the first failed check we need to disable mounting of freevxfs filesystems. If we click into the failed check, we can see the rationale behind why this check triggered as failed.
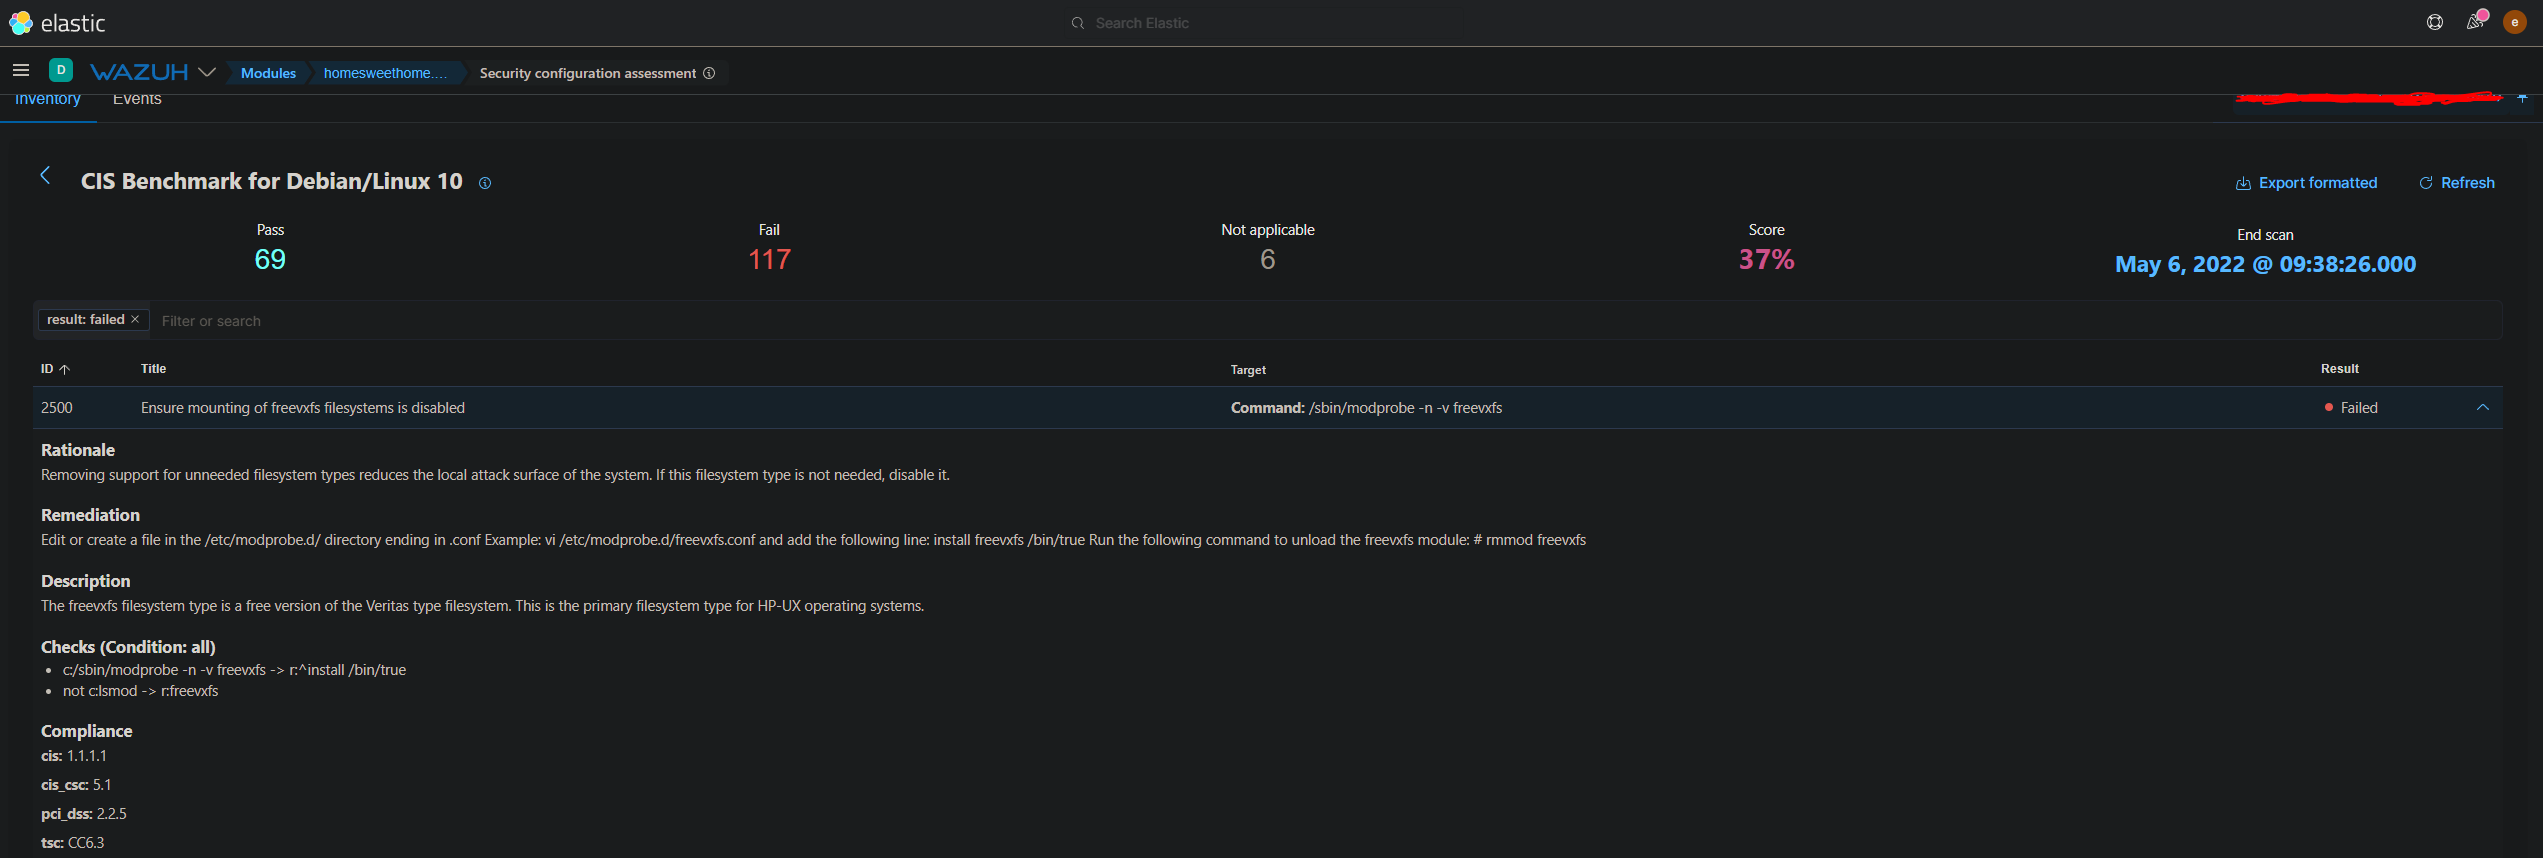
The first failed check states that we should remove unneeded filesystem types which reduces the local attack surface of the system. If there is no need for freevxfs filesystems, then we should disable it. The remediation is to create a .conf file in the /etc/modprobe.d/ directory named freevxfs. So using any text editor run the command:
sudo nano /etc/modprobe.d/freevxfs.confNow add the following line to the file:
install freevxfs /bin/trueWrite out the file and exit your text editor. Now run:
rmmod freevxfsIn the next failed check, we need to do the same exact approach for the jffs2 filesystem type. The other failed checks for filesystem types hfs, hfsplus, squashfs, udf, and FAT all need to be remediated the same way. Just be sure to carefully review each check to ensure nothing is missed.
sudo nano /etc/modprobe.d/jffs2.confinstall jffs2 /bin/truermmod jffs2